
Please note - we use affiliate links on this site. This means we might earn a commission, at no extra cost to you, if you click on a link and make a purchase. For more information, please refer to our disclosure policy.
Are you tired of dealing with that nagging upper back pain? You’re not alone. Many of us spend hours hunched over our computers, phones, and other devices, which can lead to tension and discomfort in the upper back. But don’t worry – yoga is here to help!
Yoga is a fantastic way to stretch and strengthen your muscles, improve your posture, and relieve pain. In this article, we’ll guide you through 12 yoga poses specifically designed to target and alleviate upper back pain. These poses are easy to follow, suitable for all levels, and can be done in the comfort of your own home.
Whether you’re a seasoned yogi or a complete beginner, this guide will provide you with the tools you need to ease that tension and feel better. So, roll out your mat, take a deep breath, and let’s dive into these wonderful yoga poses for upper back pain relief. Your journey to a pain-free back starts now!
Table of Contents
Yoga for Upper Back Pain: 12 Easy Poses
Dealing with upper back pain? Try these poses to find relief from upper back pain and keep your spine happy and healthy. Remember to listen to your body and go at your own pace. Let’s dive in.
1. Cat-Cow Pose (Marjaryasana-Bitilasana)
What it is: Cat-Cow pose is a gentle flow between two poses that warms up your spine.
Why do it: It helps increase flexibility and relieve tension in the back.
How to do it:
- Start on your hands and knees in a tabletop position.
- Inhale, drop your belly, lift your chest and tailbone towards the ceiling (Cow Pose).
- Exhale, round your spine, tuck your chin towards your chest and tuck your tailbone (Cat Pose).
- Repeat for 5-10 breaths.
2. Child’s Pose (Balasana)
What it is: Child’s pose is a restful pose that stretches the back and shoulders.
Why do it: It provides a gentle stretch to the back and helps calm the mind.
How to do it:
- Kneel on the floor with your big toes touching and knees wide apart.
- Sit back on your heels, then extend your arms forward, lowering your torso between your thighs.
- Rest your forehead on the mat and breathe deeply for 1-2 minutes.
3. Downward-Facing Dog (Adho Mukha Svanasana)
What it is: Downward facing dog is a foundational yoga pose that stretches the entire body.
Why do it: It lengthens the spine and strengthens the upper body.
How to do it:
- Start in a tabletop position.
- Lift your hips up and back, straightening your legs and forming an inverted V-shape.
- Press your hands firmly into the mat, keep your head between your arms, and hold for 5-10 breaths.
4. Cobra Pose (Bhujangasana)
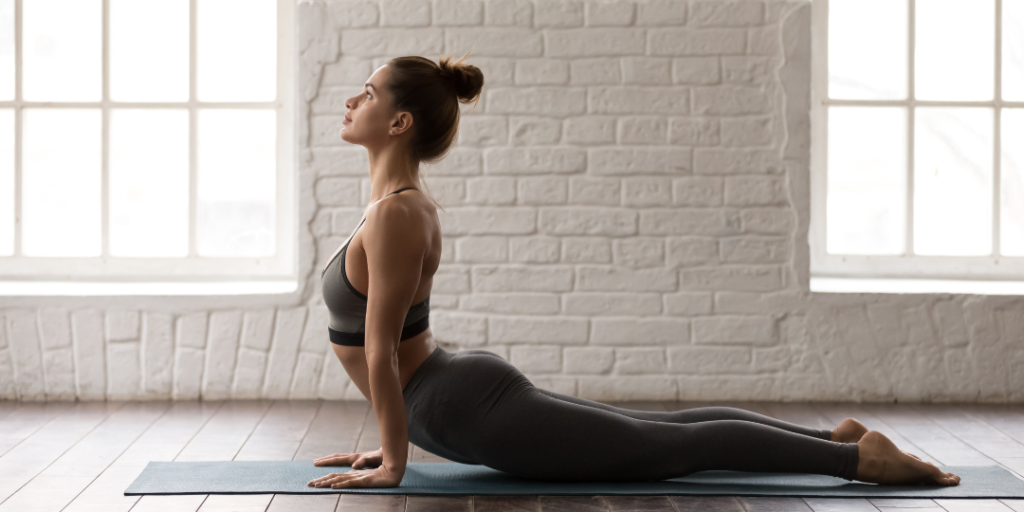
What it is: Cobra pose is a gentle backbend that stretches the spine.
Why do it: It strengthens the back muscles and improves posture.
How to do it:
- Lie on your stomach with your legs extended and the tops of your feet on the mat.
- Place your hands under your shoulders and press your elbows close to your body.
- Inhale, lift your chest off the ground, keeping your lower ribs on the mat.
- Hold for 15-30 seconds and then release.
5. Sphinx Pose (Salamba Bhujangasana)
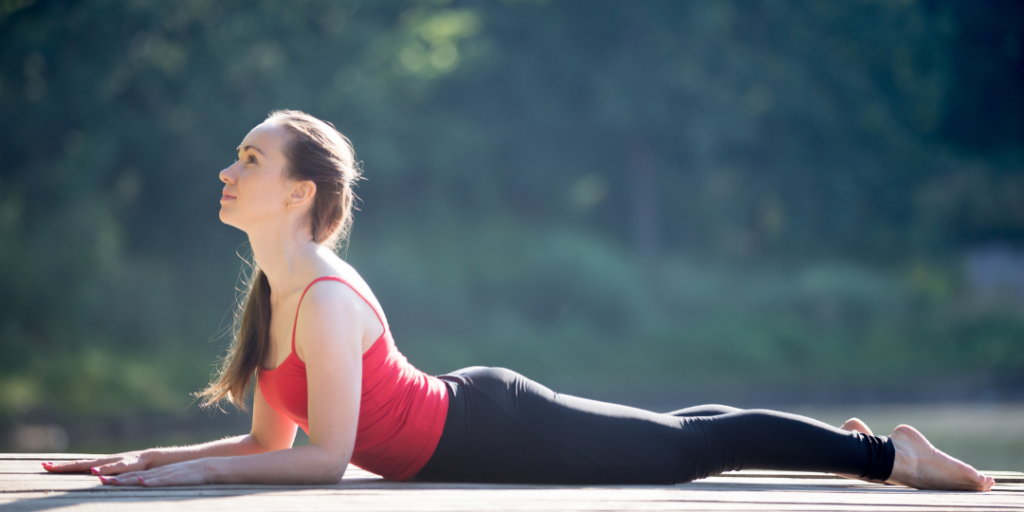
What it is: Sphinx pose is a beginner-friendly backbend.
Why do it: It gently stretch and strengthen the spine and shoulders.
How to do it:
- Lie on your stomach with your legs extended and the tops of your feet on the mat.
- Place your elbows under your shoulders with your forearms on the ground.
- Inhale, lift your chest up, keeping your lower ribs on the mat.
- Hold for 1-3 minutes.
6. Seated Forward Bend (Paschimottanasana)
What it is: Seated forward bend is a calming forward fold that stretches the spine.
Why do it: It relieves tension in the back and shoulders.
How to do it:
- Sit with your legs extended in front of you.
- Inhale, lengthen your spine, and as you exhale, fold forward from your hips.
- Reach for your feet or shins and hold for 1-2 minutes.
7. Thread the Needle Pose
What it is: Thread-the-needle pose is a twist that stretches the shoulders and upper back.
Why do it: It helps release tension in the upper back and shoulders.
How to do it:
- Start in a tabletop position.
- Slide your right arm underneath your left arm, resting your right shoulder and ear on the mat.
- Extend your left arm forward and hold for 30 seconds to 1 minute.
- Repeat on the other side.
8. Eagle Arms (Garudasana Arms)
What it is: Eagle arms pose is a shoulder and upper back stretch.
Why do it: It eases tightness in the shoulders and upper back.
How to do it:
- Sit or stand comfortably.
- Extend your arms in front of you and cross your right arm under your left.
- Bend your elbows and bring your palms together.
- Lift your elbows and stretch your fingers up, holding for 30 seconds to 1 minute.
- Switch sides.
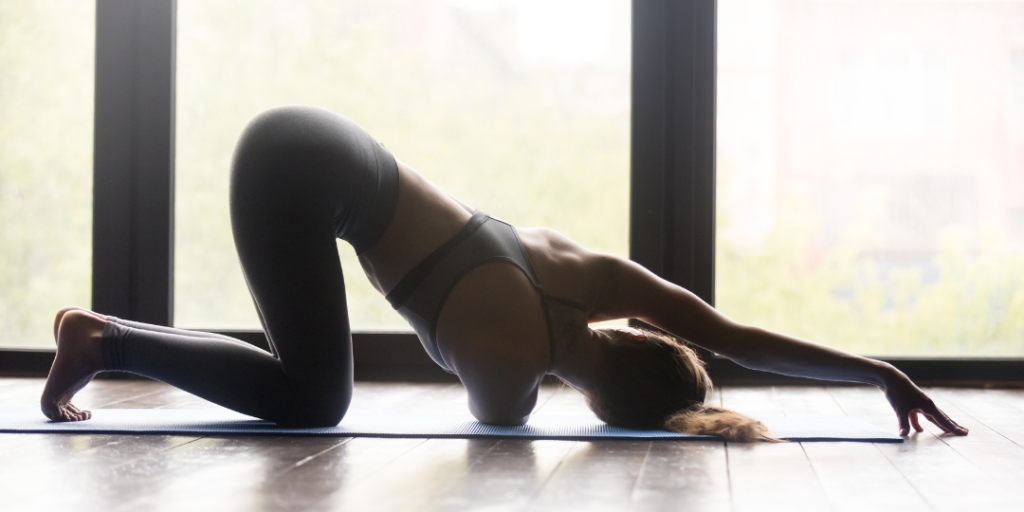
9. Puppy Pose (Uttana Shishosana)
What it is: Puppy pose is a mix between Child’s Pose and Downward-Facing Dog.
Why do it: It stretches the spine and shoulders deeply.
How to do it:
- Start in a tabletop position.
- Walk your hands forward, lowering your chest towards the mat while keeping your hips over your knees.
- Rest your forehead or chin on the mat and hold for 1-2 minutes.
10. Bridge Pose (Setu Bandhasana)
What it is: Bridge pose is a backbend that opens the chest and shoulders.
Why do it: It strengthens the back muscles and improves flexibility.
How to do it:
- Lie on your back with your knees bent and feet hip-width apart.
- Press into your feet and lift your hips towards the ceiling.
- Clasp your hands under your back and hold for 30 seconds to 1 minute.
11. Cow Face Pose (Gomukhasana)
What it is: Cow face pose is a seated stretch that targets the shoulders and upper back.
Why do it: It releases tension in the upper body and improves shoulder mobility.
How to do it:
- Sit with your legs crossed, stacking your knees if possible.
- Reach your right arm up and bend your elbow, bringing your hand down your back.
- Reach your left arm behind and try to clasp your hands.
- Hold for 30 seconds to 1 minute, then switch sides.
12. Reclined Spinal Twist (Supta Matsyendrasana)
What it is: Reclined spinal twist is a gentle twist that stretches the spine and shoulders.
Why do it: It helps release tension in the upper back and improves spinal mobility.
How to do it:
- Lie on your back with your knees bent and feet flat on the floor.
- Drop your knees to the right while turning your head to the left.
- Extend your arms out to the sides and hold for 1-2 minutes.
- Switch sides.
To learn more about yoga, you can check out our post “Complete Guide to Yoga for Beginners: 8 Easy Yoga Poses“
And if you want to learn from yoga experts, check out these online classes!
FAQs: Yoga for Upper Back Pain
1. How often should I practice these yoga poses?
You can practice these yoga poses daily or at least 3-4 times a week to see the best results. Consistency is key to relieving upper back pain and improving flexibility.
2. Can beginners do these poses?
Absolutely! These poses are suitable for all levels, including beginners. Just remember to listen to your body and not push yourself too hard. If something feels uncomfortable, ease out of the pose and try a modification.
3. How long should I hold each pose?
Hold each pose for about 30 seconds to 1 minute. For more relaxing poses like Child’s Pose and Reclined Spinal Twist, you can hold them for 1-2 minutes or longer if it feels good.
4. What should I do if a pose causes pain?
If any pose causes sharp or intense pain, stop immediately. Yoga should not cause pain. It’s normal to feel a gentle stretch but never push into pain. Consider modifying the pose or consulting a yoga instructor for guidance.
5. Do I need any special equipment for these poses?
All you need is a yoga mat for comfort. You can also use props like blocks, straps, or blankets to help support your body in certain poses, especially if you’re a beginner or have limited flexibility.
6. Can I do these poses if I have a serious back injury?
If you have a serious back injury or any medical conditions, it’s best to consult with a healthcare professional or a certified yoga therapist before starting any new exercise routine, including yoga.
7. How long will it take to see results?
Results can vary from person to person. With regular practice, you may start to feel relief from upper back pain within a few weeks. Consistency and patience are important.
8. Can I combine these poses with other forms of exercise?
Yes, these yoga poses can be a great complement to other forms of exercise. Just ensure you are not overstraining your body and always include rest and recovery time in your routine.
9. Is there a specific time of day that’s best for practicing yoga?
You can practice yoga at any time of the day. Some people prefer morning yoga to start their day with energy, while others prefer evening yoga to wind down and relax. Choose a time that fits your schedule and feels best for your body.
10. What if I can’t do all 12 poses in one session?
That’s perfectly fine! You can start with a few poses and gradually add more as you become comfortable. Even practicing a few poses regularly can help alleviate upper back pain.
yoga for a pain-free back
Congratulations on taking the first step towards relieving your upper back pain! By incorporating these 12 yoga poses into your routine, you’re not only working towards a pain-free back but also improving your overall well-being. Remember, consistency is key, and every little bit counts.
Yoga is a journey, and it’s important to listen to your body and move at your own pace. Whether you’re a beginner or an experienced yogi, these poses can help you find relief and build strength over time. Don’t get discouraged if you don’t see immediate results – with patience and regular practice, you’ll start to notice positive changes.
Celebrate each small victory, and remember that self-care is an ongoing process. You’re investing in your health and wellness, and that’s something to be proud of. Keep practicing, stay positive, and know that you’re doing something wonderful for your body and mind.
If you have any questions or need further guidance, feel free to reach out. Your journey to a healthier, happier you is just beginning. Happy stretching, and namaste!
Leave a Reply